Choosing an implant restoration laboratory used to be a conversation about materials and turnaround times. Today, it starts with a different question: can your lab accept and process the digital files your practice already produces? Scanner compatibility, open .STL acceptance, and model-less case submission have become the criteria that separate a true implant restoration partner from one that adds steps to your day.
 This guide walks you through every component of digital workflow compatibility for implant restoration laboratories. You will learn how .STL files move from your operatory to the design bench, which intraoral scanners connect directly to qualified labs, and how model-less submission can protect your chair time and reduce remakes. J & F Dental Labs accepts digital impression files from all major intraoral scanners, making them an ideal starting point for understanding what a fully compatible workflow looks like.
Key Takeaways: Digital Workflow for Implant Restoration Labs
- Digital workflow compatibility determines how quickly and accurately your implant cases move from scan to seated restoration.
- Open .STL file acceptance removes scanner lock-in and gives your practice freedom to choose the hardware that fits your operatory.
- Model-less case submission reduces production time, lowers remakes, and keeps turnaround predictable for your schedule.
- J & F Dental Labs accepts files from every major intraoral scanner and any device capable of producing an open .STL file.
- Evaluating a laboratory on scanner compatibility, file protocols, and digital case tracking protects your investment in digital dentistry.
What Is Digital Workflow Compatibility for Implant Cases?
Digital workflow compatibility is the ability of your laboratory partner to receive, validate, and fabricate from the exact digital files your practice produces. When every step from intraoral scan to final restoration stays digital, you eliminate the distortions that come with physical impression materials, stone models, and manual wax-ups.
 A compatible lab has the software, hardware, and trained technicians to take your scan data and move it directly into CAD design. This matters because any break in the digital chain, such as printing a model from a scan and then working from that model manually, reintroduces the very errors digital dentistry was built to remove.
For cosmetic dentists and prosthodontists handling complex esthetic cases, a fully digital connection to your lab means tighter marginal fit, more predictable emergence profiles, and fewer adjustments at the seating appointment.
How Do .STL Files Work in Implant Restoration?
.STL stands for Standard Tessellation Language. It is the universal file format that intraoral scanners use to describe the three-dimensional geometry of your patient's anatomy. When your scanner exports an .STL file, it creates a mesh of tiny triangles that map every surface of the prepared tooth, adjacent dentition, and soft tissue.
Your laboratory imports that .STL file into CAD software, where a technician designs the abutment and restoration directly on the digital model. Because the data is already three-dimensional and measured in microns, there is no need to pour stone, trim dies, or articulate physical casts.
Why Open .STL Acceptance Matters for Your Practice
Not every scanner exports files the same way. Some systems use proprietary formats that lock you into sending cases only to labs enrolled in that specific ecosystem. Open .STL acceptance means the lab will take files from any scanner capable of producing a standard .STL export.
This distinction protects your practice in two ways. First, you are not forced to change labs if you upgrade or switch scanners. Second, you can evaluate labs on quality and service rather than on which scanner brand they happen to support.
What Happens to Your .STL File at the Lab?
Once your .STL file arrives, a technician runs it through validation software. This step checks for distortions, missing scan data around the margin, and proper bite registration alignment. If the scan passes, the file moves directly into CAD design.
If the technician spots an issue, a digitally connected lab will contact you quickly with a screenshot or annotated image showing exactly what needs to be re-scanned. This feedback loop is faster and more precise than a phone call describing a vague problem with a physical impression.
Which Intraoral Scanners Connect to Implant Labs?
The major intraoral scanner brands each have their own method for sending files to a laboratory. Understanding these protocols helps you verify that your preferred lab can receive your data without extra steps or file conversions.
Sirona CEREC and Sirona Connect
Sirona CEREC users send files through the Sirona Connect platform. You search for your lab by name, add them to your account, and submit cases from the scanner interface. Labs registered on Sirona Connect receive the file directly into their CAD system.
3Shape TRIOS and 3Shape Communicate
3Shape TRIOS scanners use the 3Shape Communicate portal for case submission. After connecting with your lab on the portal, you select the lab when sending files from your TRIOS unit. The file transfers to the lab along with your prescription details.
iTero by Align Technology
iTero scanners require a brief setup step. You contact the iTero support line and request that your lab be added to your scanner using their lab phone number or ID. After a restart, your lab appears in the scanner's send menu.
Medit Link and Medit i-Series Scanners
Medit Link is a cloud-based platform where you search for your lab and request a partnership. Once the lab accepts, you send cases directly from Medit Link. The open architecture of Medit scanners also allows you to export raw .STL files and send them by email or file-sharing platforms.
Carestream and Dental Wings Scanners
Carestream scanners connect through Carestream Connect, where you search for and add your lab. Dental Wings users submit scans through the DWOS Connect software. Both platforms allow direct file transfer to enrolled labs.
Any Scanner With Open .STL Export
If your scanner is not listed above but can produce an open .STL file, a compatible lab will still accept your case. You simply export the .STL and send it through the lab's preferred secure upload method. J & F Dental Labs, for example, accepts files from Sirona, 3Shape, iTero, Medit, Carestream, Dental Wings, and any other scanner capable of producing an open .STL file.
What Is Model-Less Case Submission?
Model-less case submission means the laboratory designs and fabricates your restoration entirely from digital data, without printing or pouring a physical model at any point in the process. The technician works exclusively on the virtual model created from your intraoral scan.
This approach eliminates an entire category of dimensional error. Every time a digital file is converted into a physical object, whether through 3D printing or stone pouring, there is a chance of expansion, shrinkage, or surface distortion. Removing that conversion step keeps the accuracy of your original scan intact through final fabrication.
How Model-Less Workflows Reduce Chair Time and Remakes
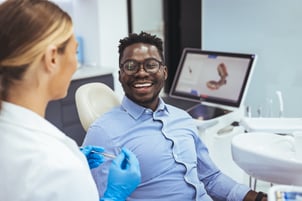 When the lab works directly from your digital scan, the restoration is designed against the exact data your scanner captured. There is no opportunity for a model to shift, crack, or warp between fabrication steps. The result is a restoration that fits more predictably at the seating appointment.
Fewer fit issues at delivery mean shorter appointments and fewer remakes. For a busy practice, that translates into a more predictable schedule and less time spent on non-billable adjustments. J & F Dental Labs uses a model-less workflow to reduce production time and cost while achieving uncompromising accuracy and superior design consistency.
When Does a Physical Model Still Make Sense?
Certain complex cases may still benefit from a verification model. Full-arch implant cases with multiple abutments, for instance, sometimes warrant a printed model to confirm passive fit across a long span before final fabrication. A quality lab will tell you when a model adds value rather than defaulting to one on every case.
The goal is not to eliminate physical models entirely. It is to use them only when they add clinical value, and to keep the default workflow digital for the speed and accuracy advantages it brings to the majority of your cases.
How Does CAD/CAM Technology Drive Implant Restoration Accuracy?
CAD/CAM stands for Computer-Aided Design and Computer-Aided Manufacturing. In implant restoration, CAD software lets the technician design your abutment and crown on a virtual model with micron-level control. CAM equipment, typically a precision milling machine, then carves the restoration from a solid block of zirconia, titanium, or PMMA.
The advantage over traditional methods is consistency. A milling machine follows the CAD file exactly, producing the same result whether it is the first case of the day or the fiftieth. That consistency reduces the variability that leads to remakes and extended seating appointments.
Why Custom Abutment Design Matters for Longevity
Stock abutments come in a limited range of shapes and angles. A custom abutment, designed in CAD software to match your patient's specific anatomy, creates the emergence profile and tissue support that stock components cannot replicate.
J & F Dental Labs uses custom CAD/CAM software to create abutments specifically designed for each patient's requirements. By designing the abutment with the final restoration in mind, the technician can control subgingival contours, cement margins, and screw access channels for a result that supports both esthetics and long-term tissue health.
The Role of Guided Surgery in Digital Implant Workflows
Guided surgery connects the restorative plan to the surgical placement. Using your CBCT scan and intraoral data, the lab designs a surgical guide that directs the drill to the exact position, depth, and angulation your restoration requires.
This restorative-driven approach means the implant is placed where it best supports the final prosthesis, not just where bone volume is most convenient. Labs with guided surgery capabilities can collaborate on the treatment plan from the earliest stage, reducing the risk of compromised abutment angles or suboptimal esthetic outcomes.
How to Evaluate a Lab's Digital Workflow Before Sending a Case
Before committing to a new laboratory partner, run through a focused checklist that covers the technical and operational aspects of their digital workflow. These questions will reveal whether the lab can truly support your practice or whether you will end up adapting your workflow to theirs.
Ask About Scanner Compatibility and File Formats
Start by confirming the lab accepts files from your specific scanner and platform. Ask whether they accept open .STL files from any scanner. A lab that restricts file types or requires you to use a specific scanner ecosystem may limit your future flexibility.
Confirm Their Model-Less Fabrication Capability
Ask whether the lab defaults to model-less fabrication or prints a model for every case. A lab that prints a model by default may not have fully invested in digital design workflows. Ask for their remake rate as well. A low remake rate paired with model-less fabrication is a strong indicator of digital workflow maturity.
Verify Case Tracking and Communication Protocols
Find out how the lab communicates case progress. Do they offer a digital portal or tracking system? Can you review and approve the CAD design before fabrication begins? Labs that let you preview a design on screen before milling reduce the risk of surprises at delivery.
Check That They Use Manufacturer-Specific Implant Components
A digitally advanced lab should also use original equipment manufacturer (OEM) components for your implant system. Using non-OEM parts can void the implant manufacturer's warranty and introduce fit issues that undermine the precision of the digital workflow. Ask whether the lab exclusively uses parts from your implant manufacturer. J & F Dental Labs uses only manufacturer-specific components to keep your warranties intact and help extend implant life from 5 years to 20 or more.
What Role Do German-Trained Technicians Play in Digital Labs?
Digital tools produce precise output, but the quality of a restoration still depends on the technician who designs it. CAD software gives the technician control over every contour, contact point, and emergence angle. A skilled technician makes decisions that software alone cannot, such as how to layer translucency for a natural appearance or how to adjust contact tightness for a specific occlusal scheme.
J & F Dental Labs employs German-trained technicians who bring a tradition of precision craftsmanship to the digital design bench. That combination of trained artistry and digital accuracy is what produces restorations that fit, function, and look natural in the mouth.
When evaluating a laboratory, ask about the training background of the technicians who will handle your cases. A lab that invests in technician education signals a commitment to quality that goes beyond equipment specifications.
Why OEM Implant Components Matter in a Digital Workflow
A fully digital workflow tracks every component from scan to seated restoration. When the lab uses OEM abutments and screws, the CAD design references the exact specifications published by the implant manufacturer. The software knows the precise connection geometry, thread pitch, and material grade of the component being designed around.
Substitute parts may appear similar but differ in tolerances that compound over time. A non-OEM abutment with a slightly different taper can create a micro-gap at the implant-abutment junction, increasing the risk of bacterial infiltration and screw loosening. According to a study published in BMC Oral Health (2025), precision at the implant-prosthetic interface is a key factor in long-term implant success, underscoring the importance of verified components.
J & F Dental Labs is one of only a handful of labs in the United States that exclusively uses parts from your implant manufacturer, ensuring compliance with FDA 510(k) standards and keeping manufacturer warranties intact.
Step-by-Step: How to Submit a Digital Implant Case
Sending your first digital case to a new lab should be straightforward. The following steps apply to most scanner-to-lab workflows and give you a clear picture of what to expect from initial scan to restoration delivery.
Step 1: Capture the Intraoral Scan
Retract tissue to expose the full margin, control moisture, and capture a complete scan of the preparation, adjacent teeth, and opposing arch. If you are scanning an implant-level impression, confirm that the scan body is fully seated and visible in the scan data.
Step 2: Export and Send the File
Use your scanner's native platform (Sirona Connect, 3Shape Communicate, iTero, Medit Link, or Carestream Connect) to send the file to your lab. If your scanner supports open .STL export, you can also use the lab's secure upload portal. Include your prescription, shade information, and any clinical photos that support the design.
Step 3: Lab Validates the Scan
The lab reviews your scan for completeness and accuracy. If any data is missing or unclear, they contact you with specific feedback so you can re-scan only the area that needs attention rather than starting over.
Step 4: CAD Design and Review
The technician designs the abutment and restoration in CAD software. Many labs offer a digital preview so you can approve the design before milling begins. This is your opportunity to request changes to contours, contacts, or emergence profile.
Step 5: Fabrication and Quality Control
After approval, the restoration is milled from the specified material (zirconia, titanium, PMMA, or lithium disilicate). The lab verifies the finished product against the CAD file for marginal fit, contacts, and esthetics before shipping.
Step 6: Delivery and Seating
The restoration arrives at your office ready for final seating. With a fully digital, model-less workflow, you can expect minimal chairside adjustments because the data integrity has been preserved from scan through fabrication.
How Does the ImplantAssist℠ Program Fit Into a Digital Workflow?
 The ImplantAssist℠ program from J & F Dental Labs is a full-service workflow that supports your implant case from the first scan to final placement. The program starts with a complimentary manufacturer-specific impression post or scan body, shipped to your office in time for the impression appointment.
From there, J & F technicians design a custom abutment using CAD/CAM software, with the final restoration planned from the beginning. Because the program uses only OEM parts, your patient's implant manufacturer warranty stays protected throughout the process.
For practices managing complex esthetic cases or multiple implant platforms in a single arch, ImplantAssist℠ removes the logistical burden of sourcing components and coordinating between surgical and restorative teams. Your team sends the case details, and J & F handles the rest.
What Questions Should Cosmetic Dentists Ask About Lab Compatibility?
Cosmetic dentists and prosthodontists working on esthetic cases need a lab partner who can match the precision of their clinical work. The following questions help you evaluate whether a lab's digital workflow is ready for the demands of complex anterior and full-arch cases.
Does the Lab Support Pre-Fabrication Design Review?
A lab that lets you review the digital design before milling gives you control over the final esthetic outcome. You can verify emergence contours, gingival harmony, and shade transitions before any material is cut.
Can They Handle Multi-Platform Implant Cases?
Esthetic full-arch cases sometimes involve implants from more than one manufacturer. Ask whether the lab can manage cases with mixed platforms and whether their digital library includes the implant connections you use.
How Do They Communicate About Complex Cases?
For demanding esthetic work, you need a lab team that will ask clarifying questions, send annotated design screenshots, and collaborate on shade selection. Clear, proactive communication is what separates a partner from a production facility.
In Conclusion: How to Choose a Digitally Compatible Lab Partner
Your investment in intraoral scanning, digital records, and modern implant systems only pays off when your laboratory partner can match that digital capability. Start by confirming open .STL acceptance and direct scanner connectivity. Verify model-less fabrication as the default workflow. Ask about OEM component use, technician training, and design review options.
A lab that meets these criteria protects your chair time, reduces remakes, and keeps the precision of your digital data intact from scan to seated restoration. J & F Dental Labs brings over 200,000 restored implant cases, German-trained craftsmanship, and compatibility with every major scanner to that partnership. Send a case and see the difference a fully digital lab partner makes in your next implant restoration.
FAQs About Digital Workflow for Implant Restoration Labs
What is an .STL file in implant dentistry?
An .STL file is a standard digital format that intraoral scanners use to capture three-dimensional surface data of your patient's anatomy. Labs import .STL files directly into CAD software for abutment and restoration design, eliminating the need for physical impressions and stone models.
Why does open .STL acceptance matter when choosing a lab?
Open .STL acceptance means the lab works with files from any scanner, not just a single brand. This keeps your practice free to select or upgrade hardware based on clinical preference rather than lab restrictions. J & F Dental Labs accepts open .STL files from any scanner capable of producing them.
How does model-less fabrication improve restoration accuracy?
Model-less fabrication keeps the entire workflow digital, removing the dimensional errors that occur when converting a digital file to a physical model. J & F Dental Labs uses model-less workflows to achieve fewer remakes, faster turnaround, and tighter marginal fit on implant restorations.
Which intraoral scanners does J & F Dental Labs support?
J & F Dental Labs accepts digital impression files from Sirona CEREC, 3Shape TRIOS, iTero, Medit, Carestream, and Dental Wings. They also accept files from any other scanner capable of producing an open .STL file, giving your practice full flexibility.
What is the ImplantAssist℠ program?
The ImplantAssist℠ program from J & F Dental Labs is a full-service implant restoration workflow. It includes a complimentary manufacturer-specific impression post or scan body, custom CAD/CAM abutment design, and ongoing case support. The program uses only OEM parts to keep manufacturer warranties intact.
Why do OEM implant components matter in a digital workflow?
OEM components match the exact specifications that CAD software references when designing your restoration. Non-OEM parts may differ in tolerances, creating micro-gaps that increase the risk of complications. J & F Dental Labs exclusively uses manufacturer-specific parts to protect implant longevity and warranty coverage.